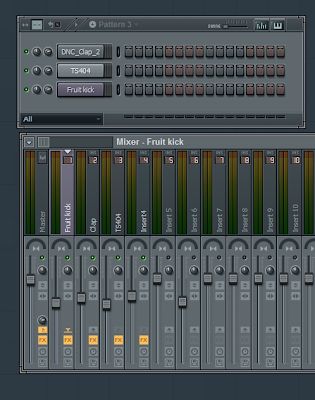
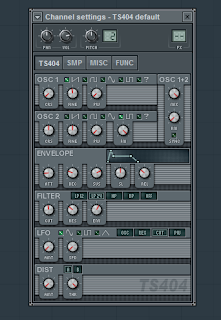
Fl Studio is a great tool for composers/music enthusiats and instrumentalists who are looking to get into the world of music production from your home. It has great features for making amazing sounding tracks. The major area where I feel it lacks is the recording part. Even there you could always use Edison (recording interface in FL studio) to record your vocals or instrument. It is just cumbersome and has a few steps involved to make it happen. I prefer the Ableton method of recording.
Still Fl studio is much lesser in price and when I started out making music covers and my own compositions, FL studio was the best software that I could afford along with all the other equipment needed for putting a home studio together.
However when it came to setting up my music studio I did not have a whole lot of places to get advice from, spent months talking to people and researching online on how to set up the ideal home studio. Even on youtube there would be videos, but people would not want to give clear directions on how to set up a home studio.
So for all of you out there that want to set up a good home studio, hope to help you avoid all the hard work and frustrations I went through by providing information through this article.
To get started using Fl Studio for your studio. Here are the basic tools you will need for sure.
- A good PC can be desktop/laptop - anything with at least 1.5-1.8Ghz of speed with at least 4GB of RAM will work. Remeber Fl studio only runs on windows, so you do not want to invest in a MAC if this is your choice of DAW.
- I upgraded the RAM on my PC with an 3GB kit giving a total of 6GB...I would recommend this is your planning on running a lot of VST instruments and using them during live performances. If you are just doing studio work, then you can get by with even 2GB RAM.There are few tricks to optimize FL studio for this. I will talk about those in later tutorials. Follow the link below to get the latest generation of laptops, even the cheapest one will be able to run FL studio fine. Make sure you do end up getting one with at least 500GB of hard disk space. Once you install all the VSTs and start making audio tracks in wav format....it is a given that you will start running out of space.
Shop Amazon Computers - New Laptops for 2012
- FL Studio -- whichever version you can afford is good, the version shown below is great starting point and is powerful enough for you to make stunning tracks. I ended up with their producer edition with all tools. The fruity edition is also a good place to start if you are strapped for cash. You can always upgrade and build the instrument collection in FL from their website. They are very helpful and the other great thing is FLstudio offers lifetime updates. The links below show you the best versions of FL that are available now. The signature bundle is great and if your are a student you get it for an amazingly low price.
- If you have a laptop/desktop and do not have the space to put studio monitors I highly recommend investing money to get any one of the headphones listed below.
- Audio Technica Monitor headphones - ATH m40fs - I own these, swear by them, many of my youtube videos have been mixed using them. For example check the following songs out. Song 1 and Song 2.
- Audio Technica has also released an M35 headphones and looking at the specs for the headphone, they should work well too.
- Sony MDR-V6 - I own these too and they are industry standard along with the little more expensive Sony- MDR7506. The following songs were mixed using these Song 1 and Song 2
- Shure SRH 440 Pro - Heard it at my friends home and was very impressed.
Studio Monitors - No matter who tells you what,a good pair of studio monitors are a must in any home studio. It does not matter the size of the monitors you get, mostly depends on your ear and what feels good for you in the mid range and higher frequencies, mixing bass is a difficult thing in a home studio and you are better off using the headphones for that.
M-Audio AV40 - I own these and do all my rough mixes on them, around 60 videos on my channel originated on these. They are very good with mid range and highs, but when it comes to mixing lows, you will need to use your headphones or get a subwoofer.
Stepping up further, M-Audio B5 - don't own them...but have heard good things about
them
The next piece of equipment that you will need will be an audio interface. For the longest time I used one of the Behringer usb based audio interfaces along with a 2 channel mixer. As time progressed I upgraded to a Tascam interface and a 10 channel mixer. I record Drums sometimes and need more than 6 channels. This will depend on you are set up and how much of recording you do. If you are just doing single channel of vocals, or instrument you could always go with the following products.
My very first setup which I highly recommend would be the combination of the following. A usb interface that will plug into the tape outs of a small mixer using a normal 2 channel RCA cable.
For the small mixer my choice would be the following product.
That should get you going very quickly, plus you will have good preamp on the mixer so the signal strength should be more than enough to the system.
For a one stop solution, you will need to spend a bit more and I can recommend the following devices.
Best - USB based entry level choices
M-Audio Fast Track - Entry level audio interface, they are excellent for smaller bands who can record tracks seperately.
Tascam US-100 - Another Entry level interface that has got great reviews. Again this will be one track at a time, or a vocal and an instrument together.
Final piece is a midi controller.
I am providing cheap controller options based on my experience, you can always research and invest in more powerful and expensive controller if you are at a intermediate or advanced user. If you are then I would think this article might not be for you in the first place :)! The following solutions from akai can be got together for less than 100$ and when working together, they form a very tight solution for all instruments and controls.Highly recommend this option since it will be much more portable for live performances too.
If you are a DJ, then go with a usb DJ interface. I am not an expert on those, so use the amazon search above and have fun finding the products that will fit your needs.
If you are more of a piano player then get yourself one of the bigger midi keyboards. I own an M-Audio Oxygen 49 and it has been working great for over 5 years now.
If you already own a entry level piano at home, good news you save some money.....I would suggest picking up the following device to hook your piano to the pc/mac. I run my entry level Yamaha PSR keyboard to my system using the EMU midi interface. There are other cheaper options available if you choose to go the non branded way.
My follow up post in the FL Studio basics will be how to work with midi and vsts to make a simple track.
Thanks for Reading!
You can check out my work here. I mostly do instrumental covers/ remixes of major songs from all around the world.
Disclaimer - These are products that I have used, am using or have seen in action. Just like any other review site, please read about the products before you purchase them. I am in no way affiliated to any of the product companies above or bear no responsibility if one of them does not work for you.


